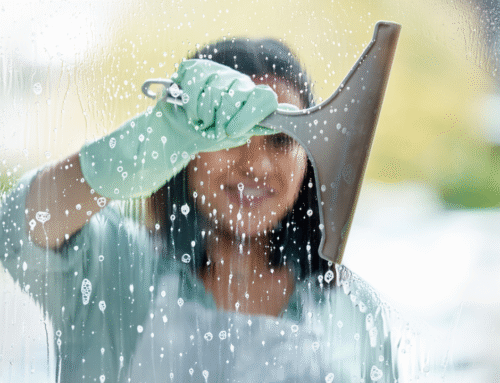
One of the most unenviable tasks for any homeowner is cleaning the outside of your windows. Putting it off for the last second is completely understandable; cleaning windows can be a difficult task. However, the reason why it can be difficult is oftentimes because of poor planning and execution.
Usually, we’ll waste rolls and rolls of paper towels or torture our window panes with old newspapers. We use way too much window cleaner, burning a hole in our pockets and giving us a headache for our troubles.
We’ll correct that all today. Thanks to King of Maids cleaning services NYC, we are going to explore the professional methods of cleaning windows correctly. This easy to follow guide will help you so much, you will actually look forward to cleaning your windows more regularly. Let’s get right to it.
What to Avoid

When it comes to proper window cleaning, there are a couple of things that you want to avoid doing:
Starting on the bottom: If you start on the first-floor windows and work your way up, then you will immediately ruin the work you put in at the start. Cleaning the windows up top will result in dirty water dripping down on your freshly cleaned first-floor windows.
Rubbing spots: This is the most naturally occurring error we make on window cleaning. Usually, when we clean windows, we think to rub in circular motions like “wax on, wax off.” Rubbing windows often just moves dirt from one area to another without removing it. Not only that, but rubbing also causes static on the glass, making it easier for dirt to attach itself to your windows.
The same direction: When you are squeegeeing the windows, wash the exteriors from side to side and wash the interiors vertically. That way when you double-check for streaks at the end, you’ll know which side of the window the streak is on.
Supplies

Let’s start with what you don’t need – paper towels and a spray bottle! Save your Windex for cleaning mirrors and picture frames. Cleaning the outside windows with these will take you twice as long and you’ll work twice as hard to get similar results. Ditch them.
Here’s what you’ll need instead:
Strip Applicator: These absorbent microfiber pads will do the trick when it comes to washing the windows.
Squeegee: Make sure your squeegee has a sharp rubber blade. This will ensure that you leave your windows without annoying streaks.
Microfiber Cloth: You will need a clean towel, or preferably a microfiber cloth, to dry off any remaining drops of water after you squeegee. Microfiber is preferred over cotton towels because microfiber cloth does not shed any lint.
Sponge: Sponges are handy for addressing smaller windows, multi-pane windows, and difficult corners in the window frame.
Bucket of Soapy Water: The best mix to clean up dirt and grime on windows would be a solution of 2 gallons water and 2 tablespoons of laundry detergent. The fewer suds, the better.
Step One: Washing

Before you start, it’s a great idea to take your portable vacuum to the window screens. This will speed up your cleaning time greatly. Next, use your strip applicator to cover the windows in the soapy water solution. Dip your applicator into the mixture, wring it out lightly, and then get to work on the windows.
Be thorough but make sure not to overdo it with the water; you don’t want to leave unsightly streaks on your brick or panel finish. Spread the water evenly and make sure you don’t soak the woodwork with dirty water. If you do, then you can use your cloth to spot-clean any pools of water.
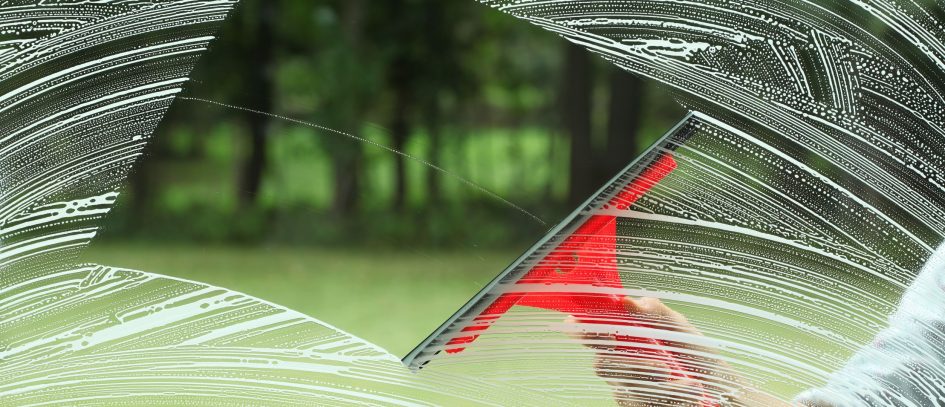
Step Two: Squeegeeing

The best technique when it comes to using your squeegee is to start at the top of the window and work in straight, singular motions. Avoid leaving streaks by squeegeeing over the lines you left from the previous run.
Once you finish one pane, wipe the squeegee off with a microfiber cloth before moving on to the next one.
Step Three: Dry Wiping

After you finish using the squeegee to remove the suds, use a cloth to dry down the build-up of water along the edges of the windows and the base. Just use a dry microfiber cloth to wipe away any remaining water along the edges and corners of the frames.
Finally, check your windows for streaks. If you see a few, use your cloth to wipe away the streaks. Use your cloth to dry the window sill.
If you just follow this guide, you will notice that your windows are the cleanest they’ve ever been to. The process is simple and quick; you will have cleaned your windows in half your usual time with half the effort.
This article was written by King of Maids, a platform that makes it super easy for you to book a professional home cleaning. Visit King of Maids here: https://www.kingofmaids.com/